

Munin 是一款类似 RRD tool 的非常棒的系统监控工具,它能提供给你多方面的系统性能信息,例如 磁盘、网络、进程、系统和用户。这些是 Munin 默认监控的内容。
Munin 如何工作?
Munin 以客户端-服务器模式运行。主服务器上运行的 Munin 服务器进程会从本地运行的客户端守护进程(Munin 可以监控它自己的资源)或者远程客户端(Munin 可以监控上百台机器)收集数据,然后在它的 web 界面上以图形的方式显示出来。
在服务器中配置 Munin
要配置服务器端和客户端,我们需要完成以下两步。
- 安装 Munin 服务器软件包并配置,使得它能从客户端收集数据。
- 安装 Munin 客户端,使得服务器能连接到客户端守护进程进行数据收集。
在 Linux 上安装 munin 服务器端
在基于 Ubuntu/Debian 的机器上安装 Munin 服务器:
apt-get install munin apache2
在基于 Redhat/CentOS 的机器上安装 Munin 服务器:
在基于 Redhat 的机器上安装 Munin 之前,你需要确保 启用 EPEL 软件仓库,因为基于 Redhat 的机器的软件仓库默认没有 Munin。
yum install munin httpd
在 Linux 上配置 Munin 服务器端
下面是我们要在服务器上启动 Munini 所进行的步骤:
- 在 /etc/munin/munin.conf 中添加需要监控的主机详情。
- 配置 apache web 服务器使其包括 munin 配置。
- 为 web 界面创建用户名和密码
- 重启 apache 服务器
步骤 1
在 /etc/munin/munin.conf 文件中添加主机条目。调到文件末尾添加要监控的客户端。在这个例子中,我添加了要监控的数据库服务器和它的 IP 地址。
示例:
[db.linuxnix.com]
 address 192.168.1.25
 use_node_name yes
保存文件并退出。
步骤 2
在 /etc/apache2/conf.d 目录中编辑或创建文件 munin.conf 用于包括 Munin 和 Apache 相关的配置。另外注意一点,默认其它和 web 相关的 Munin 配置保存在 /var/www/munin 目录。
vi /etc/apache2/conf.d/munin.conf
内容:
Alias /munin /var/www/munin
<Directory /var/www/munin>
 Order allow,deny
 Allow from localhost 127.0.0.0/8 ::1
 AllowOverride None
 Options ExecCGI FollowSymlinks
 AddHandler cgi-script .cgi
 DirectoryIndex index.cgi
 AuthUserFile /etc/munin/munin.passwd
 AuthType basic
 AuthName "Munin stats"
 require valid-user
 <IfModule mod_expires.c>
 ExpiresActive On
 ExpiresDefault M310
 </IfModule>
</Directory>
保存文件并退出。
步骤 3
现在为查看 munin 的图示而创建用户名和密码:
htpasswd -c /etc/munin/munin-htpasswd munin
注意:对于 Redhat/Centos 机器,要访问你的配置文件,需要在每个路径中用 “httpd” 替换 “apache2”。
步骤 4
重启 Apache 服务器,使得 Munin 配置生效。
基于 Ubuntu/Debian :
service apache2 restart
基于 Centos/Redhat :
service httpd restart
在 Linux 上安装和配置 Munin 客户端
步骤 1
在 Linux 上安装 Munin 客户端
apt-get install munin-node
注意:如果你想监控你的 Munin 服务器端,你也需要在服务器端安装 munin-node。
步骤 2
编辑 munin-node.conf 文件配置客户端。
vi /etc/munin/munin-node.conf
示例:
allow ^127.0.0.1$
allow ^10.10.20.20$
# 以及哪个端口
port 4949
注意: 10.10.20.20 是我的 Munin 服务器,它连接到客户端的 4949 端口获取数据。
步骤 3
在客户端机器中重启 munin-node:
service munin-node restart
测试连接
检查你是否能从服务器的连接到客户端的 4949 端口,如果不行,你需要在客户端机器中的防火墙打开该端口。
telnet db.linuxnix.com 4949
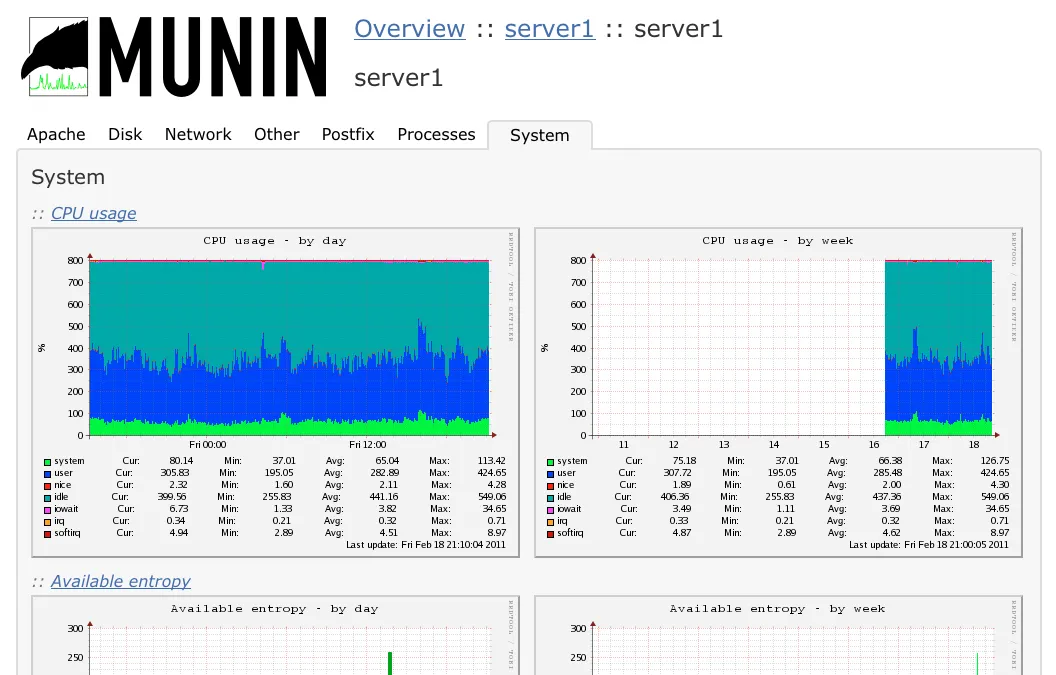
访问 Munin web 页面
http://munin.linuxnix.com/munin/index.html
希望这些能对你配置基本的 Munin 服务器有所帮助。
via: http://www.linuxnix.com/install-and-configure-munin-monitoring-server-in-linux/
作者:Surendra Anne 译者:ictlyh 校对:wxy
发表回复