Nagios 是一个自由开源的网络和警报引擎,它用于监控各种设备,例如网络设备和网络中的服务器。它支持 Linux 和 Windows,并提供了直观的 Web 界面,可让你轻松监控网络资源。经过专业配置后,它可以在服务器或网络设备下线或者故障时向你发出邮件警报。在本文中,我们说明了如何在 RHEL 8/CentOS 8 上安装和配置 Nagios Core。

Nagios Core 的先决条件
在开始之前,请先检查并确保有以下各项:
- RHEL 8/CentOS 8 环境
- 能通过 SSH 访问该环境
- 快速稳定的互联网连接
满足上述要求后,我们开始吧!
步骤 1:安装 LAMP
为了使 Nagios 能够按预期工作,你需要安装 LAMP 或其他 Web 软件,因为它们将在浏览器上运行。为此,请执行以下命令:
# dnf install httpd mariadb-server php-mysqlnd php-fpm
你需要确保 Apache Web 服务器已启动并正在运行。为此,请使用以下命令启用并启动 Apache 服务器:
# systemctl start httpd
# systemctl enable httpd
检查 Apache 服务器运行状态:
# systemctl status httpd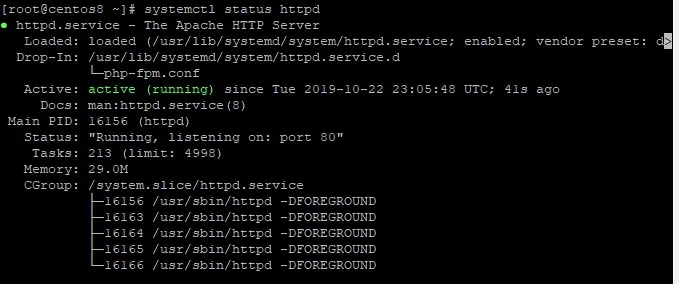
接下来,我们需要启用并启动 MariaDB 服务器,运行以下命令:
# systemctl start mariadb
# systemctl enable mariadb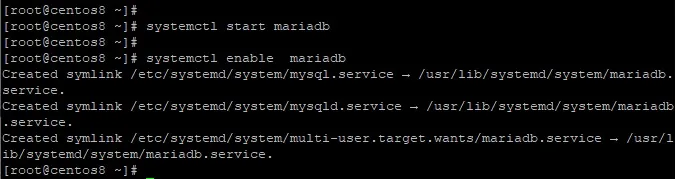
要检查 MariaDB 状态,请运行:
# systemctl status mariadb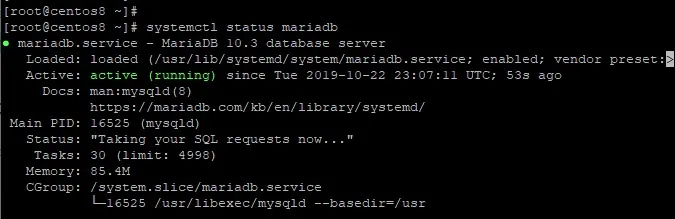
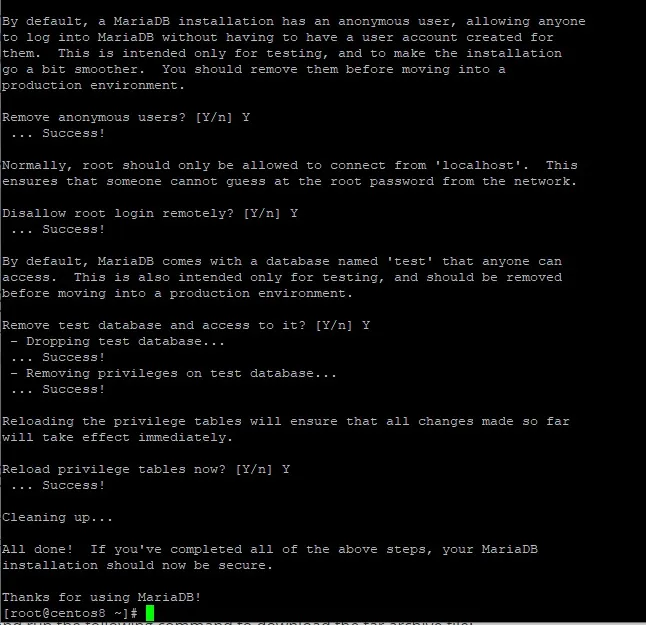
另外,你可能会考虑加强或保护服务器,使其不容易受到未经授权的访问。要保护服务器,请运行以下命令:
# mysql_secure_installation确保为你的 MySQL 实例设置一个强密码。对于后续提示,请输入 “Y” 并按回车。
步骤 2:安装必需的软件包
除了安装 LAMP 外,还需要一些其他软件包来安装和正确配置 Nagios。因此,如下所示安装软件包:
# dnf install gcc glibc glibc-common wget gd gd-devel perl postfix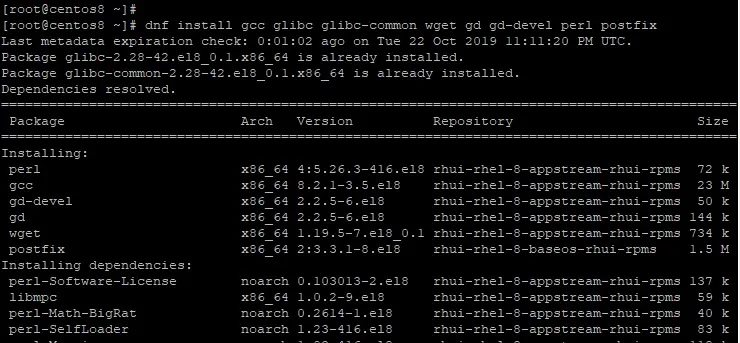
步骤 3:创建 Nagios 用户帐户
接下来,我们需要为 Nagios 用户创建一个用户帐户。为此,请运行以下命令:
# adduser nagios
# passwd nagios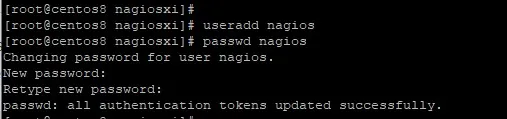
现在,我们需要为 Nagios 创建一个组,并将 Nagios 用户添加到该组中。
# groupadd nagiosxi现在添加 Nagios 用户到组中:
# usermod -aG nagiosxi nagios另外,将 Apache 用户添加到 Nagios 组:
# usermod -aG nagiosxi apache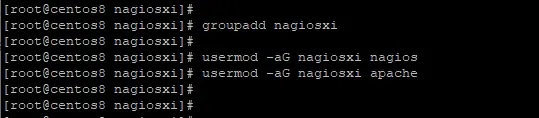
步骤 4:下载并安装 Nagios Core
现在,我们可以继续安装 Nagios Core。Nagios 4.4.5 的最新稳定版本于 2019 年 8 月 19 日发布。但首先,请从它的官方网站下载 Nagios tarball 文件。
要下载 Nagios Core,请首进入 /tmp 目录:
# cd /tmp接下来下载 tarball 文件:
# wget https://assets.nagios.com/downloads/nagioscore/releases/nagios-4.4.5.tar.gz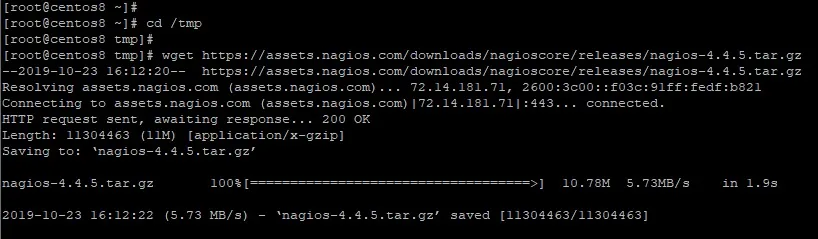
下载完 tarball 文件后,使用以下命令将其解压缩:
# tar -xvf nagios-4.4.5.tar.gz接下来,进入未压缩的文件夹:
# cd nagios-4.4.5按此顺序运行以下命令:
# ./configure --with-command-group=nagcmd
# make all
# make install
# make install-init
# make install-daemoninit
# make install-config
# make install-commandmode
# make install-exfoliation
要配置 Apache,请运行以下命令:
# make install-webconf步骤 5:配置 Apache Web 服务器身份验证
接下来,我们将为用户 nagiosadmin 设置身份验证。请注意不要更改该用户名,否则,可能会要求你进一步的配置,这可能很繁琐。
要设置身份验证,请运行以下命令:
# htpasswd -c /usr/local/nagios/etc/htpasswd.users nagiosadmin
系统将提示你输入 nagiosadmin 用户的密码。输入并按要求确认密码。在本教程结束时,你将使用该用户登录 Nagios。
为使更改生效,请重新启动 Web 服务器:
# systemctl restart httpd步骤 6:下载并安装 Nagios 插件
插件可以扩展 Nagios 服务器的功能。它们将帮助你监控各种服务、网络设备和应用。要下载插件的 tarball 文件,请运行以下命令:
# wget https://nagios-plugins.org/download/nagios-plugins-2.2.1.tar.gz接下来,解压 tarball 文件并进入到未压缩的插件文件夹:
# tar -xvf nagios-plugins-2.2.1.tar.gz
# cd nagios-plugins-2.2.1
要安装插件,请编译源代码,如下所示:
# ./configure --with-nagios-user=nagios --with-nagios-group=nagiosxi
# make
# make install
步骤 7:验证和启动 Nagios
成功安装 Nagios 插件后,验证 Nagios 配置以确保一切良好,并且配置中没有错误:
# /usr/local/nagios/bin/nagios -v /usr/local/nagios/etc/nagios.cfg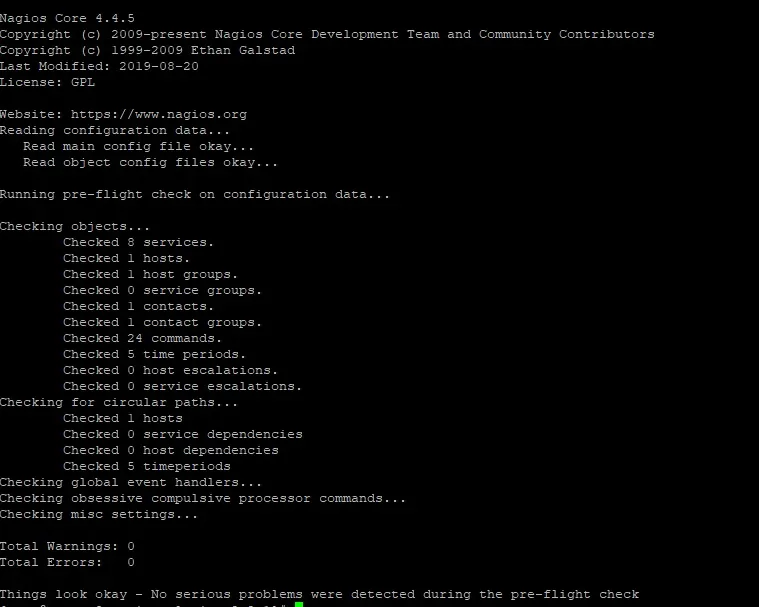
接下来,启动 Nagios 并验证其状态:
# systemctl start nagios
# systemctl status nagios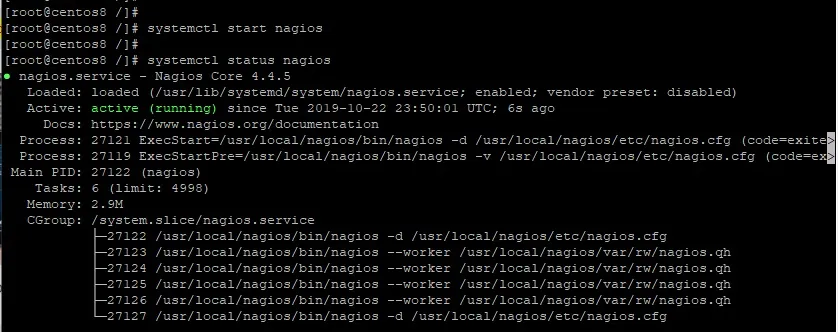
如果系统中有防火墙,那么使用以下命令允许 ”80“ 端口:
# firewall-cmd --permanent --add-port=80/tcp# firewall-cmd --reload步骤 8:通过 Web 浏览器访问 Nagios 面板
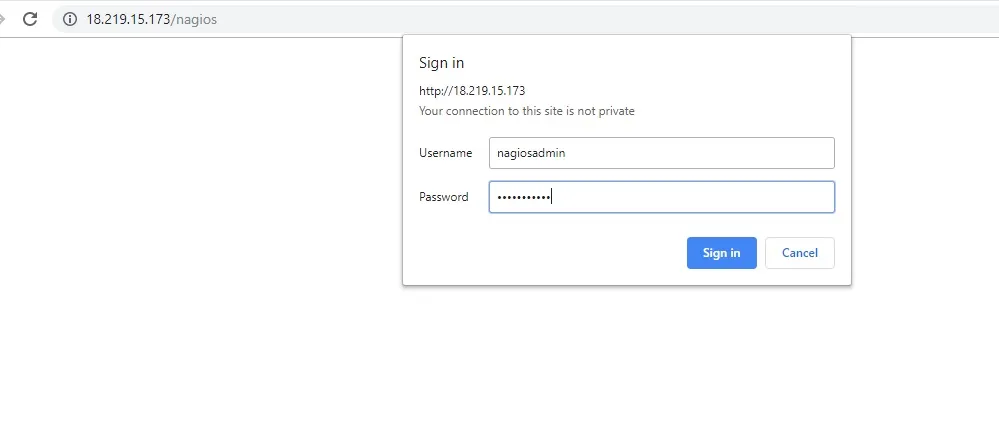
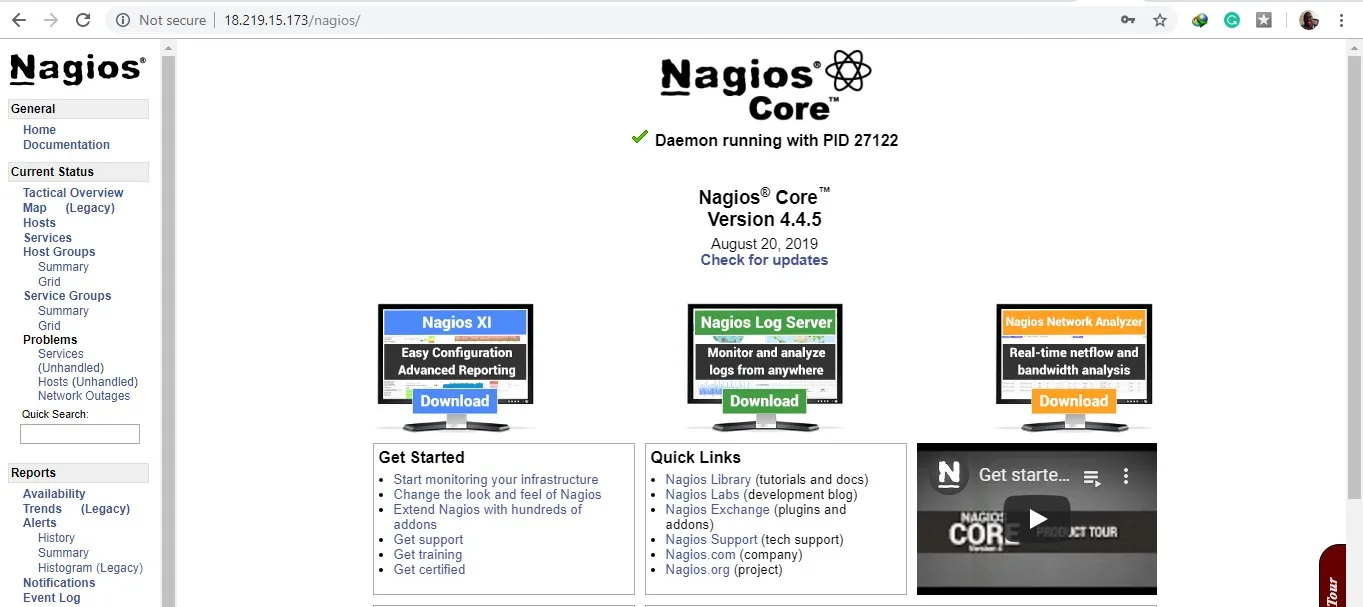
要访问 Nagios,请打开服务器的 IP 地址,如下所示:http://server-ip/nagios 。
这将出现一个弹出窗口,提示输入我们在步骤 5 创建的用户名和密码。输入凭据并点击“Sign In”。
这将引导你到 Nagios 面板,如下所示:
我们终于成功地在 CentOS 8 / RHEL 8 上安装和配置了 Nagios Core。欢迎你的反馈。
via: https://www.linuxtechi.com/install-nagios-core-rhel-8-centos-8/
作者:James Kiarie 选题:lujun9972 译者:geekpi 校对:wxy
发表回复