
本文将帮助你设计一个基于 Web 的应用程序,使用 Node-RED 为地铁站的汽车提供一个自动智能停车系统。

Web 应用程序是在 Web 服务器上运行的软件。终端用户通过 Web 浏览器访问 Web 应用程序。Web 应用程序使用客户端—服务器(C/S)架构进行编程,该架构是用户(客户端)通过远程服务器(可能由第三方托管)提供服务。Web API(应用程序编程接口)在整个 Web 上是可用的,用户可以通过 HTTP 协议访问该接口,如图 1 所示。

本文将演示如何为地铁设计一个基于 Web 的汽车自动智能停车系统。 它是使用开源的 Node-RED 设计。该系统使用模板节点创建了一个交互式的、时尚的用户登录表单,用 HTML 和 CSS 编码以获取车主的详细信息,从而实现停车系统的自动化。我们可以在图 2 和图 3 看到登录表单和提交表单的流程图。
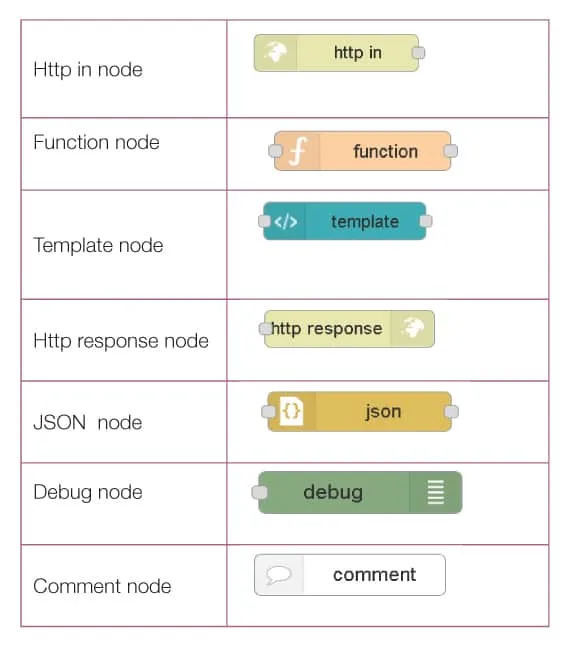
使用的节点如下:
地铁智能停车节点流程设计
Node-RED 由 node-red 命令激活。访问网址 http://127.0.0.1:1880/ 可以看到 Node-RED 用户界面流程浏览器已经启用,可以认为 Node-RED 设置已完成,可以正常工作了。
按照下面给出的步骤创建登录表单和提交表单。

登录表单
1、在节点画布中,拖放 http 输入 节点,这会为创建 Web 服务创建一个 HTTP 访问点。
2、将 http 输入 节点连接到 函数 节点。函数节点有助于编写 JavaScript 函数处理节点接收到的消息。

3、将 函数 节点连接到 模板 节点,模板节点基于提供的模板创建一个 Web API。
4、将 模板 节点连接到 http 响应 节点,它将响应 http 输入 节点的请求。
提交表单
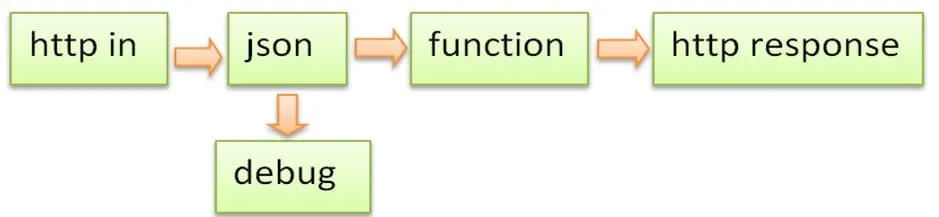
1、拖放 http 输入 节点并将其连接到 json 节点,json 节点将数据转换为 JSON 字符串进行通信。
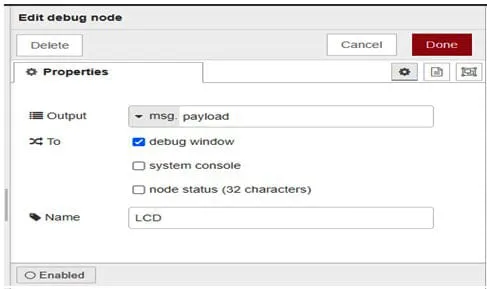
2、将 http 输入 节点连接到 调试 节点,调试节点的调试监控器会输出结果。
3、将 json 节点放置并连接到 函数 节点,将后者连接到 http 响应 节点。
创建完整流程后,单击 Node-RED 窗口右上角的 部署 按钮。访问 http://127.0.0.1:1880/ui/ 这个链接查看用户界面。
输入链接然后单击 提交 后,该链接会跳转到下一页,你可以在该页面阅读所有新闻。
Node-RED 工作流程
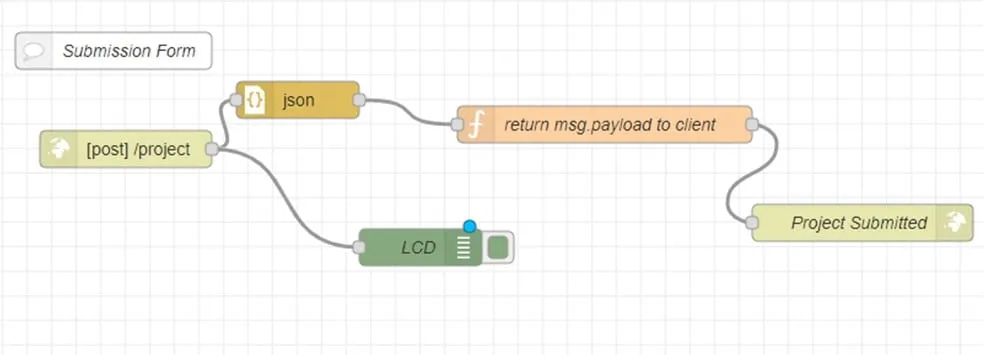
在单个 Node-RED 流程中,你可以创建登录表单和提交表单,如图 4 和图 5 所示。
现在我们将配置节点属性。
登录表单
编辑 http 输入 属性:
- 方法 选择 “Get”
- 网址 设为
/MetroStation - 名称 配置为 “ 智能停车系统 ”。
(LCTT 译注:下文 http 响应节点的名称为 Smart parking,p 字母小写,为了区分,此处中文翻译成智能停车系统。)

注意:URL 可以使用任何用户定义的本地变量。
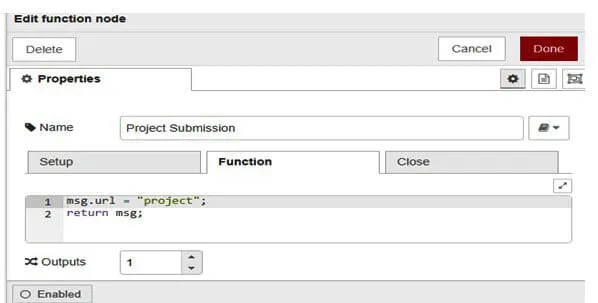
现在选择 函数 节点,编辑函数节点属性:输入代码 msg.url = project ,并配置代码 名称 字段为 “ 项目提交 ”。
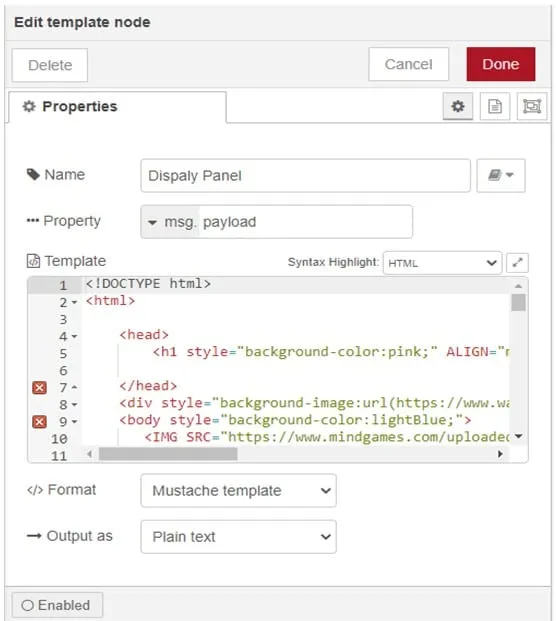
在 模板 节点的属性窗口,为登录表单配置相应的 HTML 代码,并将代码 名称 命名为 “ 显示面板 ”。在此流程使用了 Mustache 模板格式(LCTT 译注:Mustache 是胡子的意思,因为它的嵌入标记 {{ }} 非常像胡子)。Mustache 是一个简单的 Web 模板系统,被描述为无逻辑的模板引擎。Mustache 没有任何显式的控制流语句,例如 if 和 else 条件和 for 循环。可以通过使用块标签处理列表和lambdas 来实现循环和条件评估。
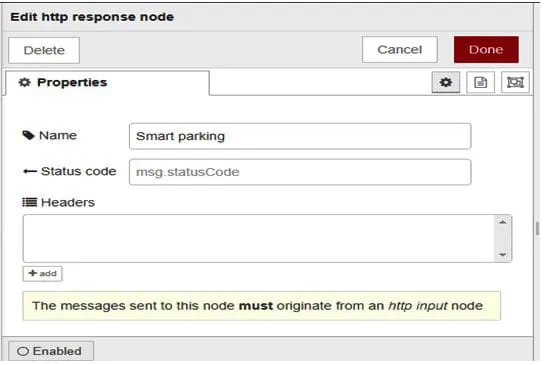
配置编辑 http 响应 节点的属性, 名称 设为 “ 智能停车 ”(图 9) 。
提交表单
在 http 输入 节点的编辑属性窗口, 方法 选择 “POST” , 网址 设为 /project。

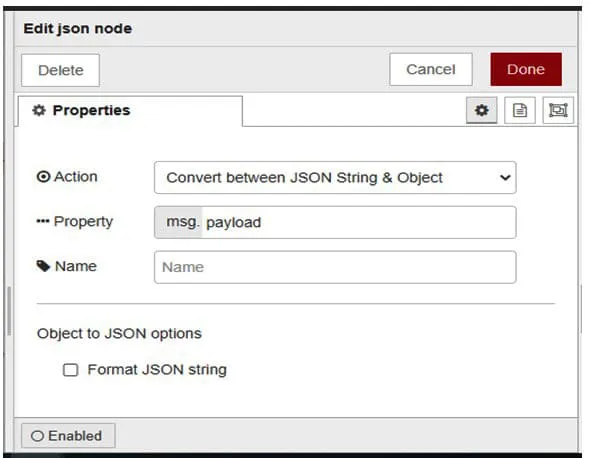
在 JSON 节点的编辑窗口, 操作 设为 “ JSON字符串与对象互转 ”,参考图 11。
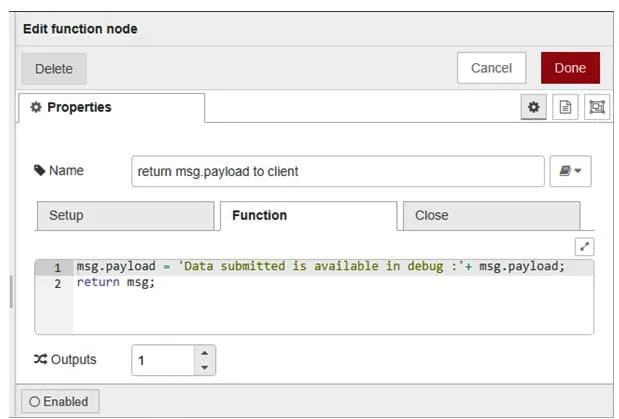
函数 节点的配置如图 12 所示。
在 http 响应 节点,编辑属性 名称 为 “ 已提交项目 ”。

注意:添加带有评论的评论节点作为 “登录表单” 和 “提交表单”。
用户界面的控制面板
当用户单击 提交 ,给出的数据将显示在用户界面和调试节点。如果单击 重置 ,详细信息将被清除,允许用户输入新的详细信息(图15)。
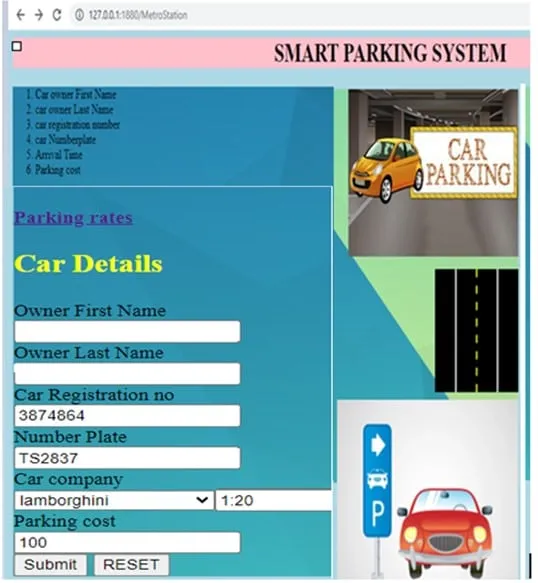
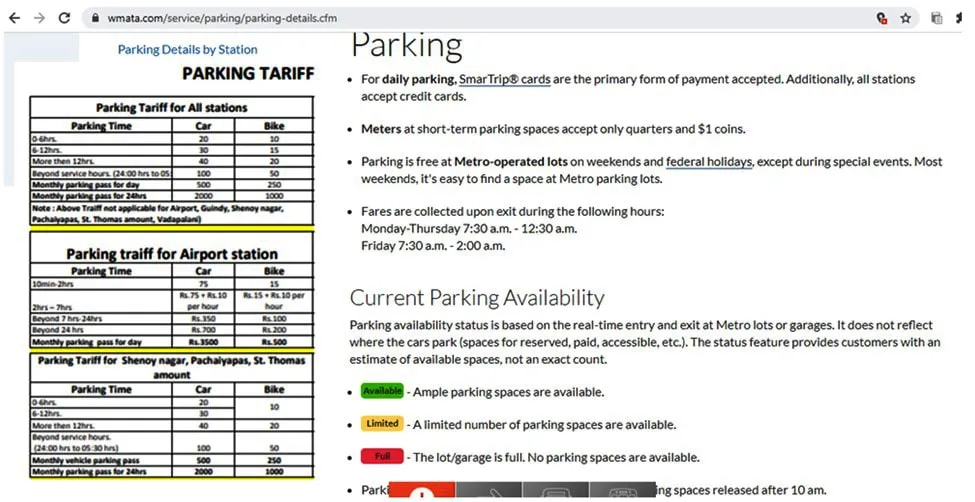
地铁停车费率通过超链接提供,收费表在用户界面显示。因此,汽车智能停车系统通过适当的超链接实现自动化,展示地铁站的停车费。该自动化系统的最终输出可以在 Node-RED 控制面板的用户界面和调试监控器调取和展示。
via: https://www.opensourceforu.com/2022/06/build-a-smart-parking-system-for-a-metro-station/
作者:Dr Maheswari R. 选题:lkxed 译者:Maisie-x 校对:wxy
发表回复