
在这个快速入门教程中,我们使用 Azure CLI 创建一个 Kubernetes 集群,然后在集群上部署运行由 Web 前端和 Redis 实例组成的多容器应用程序。一旦部署完成,应用程序可以通过互联网访问。
这个快速入门教程假设你已经基本了解了 Kubernetes 的概念,有关 Kubernetes 的详细信息,请参阅 Kubernetes 文档。
如果您没有 Azure 账号,请在开始之前创建一个免费帐户。
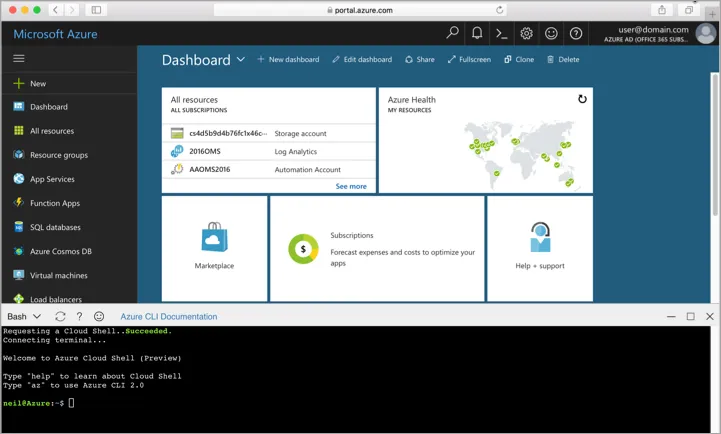
登录 Azure 云控制台
Azure 云控制台是一个免费的 Bash shell,你可以直接在 Azure 网站上运行。它已经在你的账户中预先配置好了, 单击 Azure 门户右上角菜单上的 “Cloud Shell” 按钮;

该按钮会启动一个交互式 shell,您可以使用它来运行本教程中的所有操作步骤。
此快速入门教程所用的 Azure CLI 的版本最低要求为 2.0.4。如果您选择在本地安装和使用 CLI 工具,请运行 az --version 来检查已安装的版本。 如果您需要安装或升级请参阅安装 Azure CLI 2.0 。
创建一个资源组
使用 az group create 命令创建一个资源组,一个 Azure 资源组是指 Azure 资源部署和管理的逻辑组。
以下示例在 eastus 区域中创建名为 myResourceGroup 的资源组。
az group create --name myResourceGroup --location eastus输出:
{
  "id": "/subscriptions/00000000-0000-0000-0000-000000000000/resourceGroups/myResourceGroup",
  "location": "eastus",
  "managedBy": null,
  "name": "myResourceGroup",
  "properties": {
    "provisioningState": "Succeeded"
  },
  "tags": null
}
创建一个 Kubernetes 集群
使用 az acs create 命令在 Azure 容器服务中创建 Kubernetes 集群。 以下示例使用一个 Linux 主节点和三个 Linux 代理节点创建一个名为 myK8sCluster 的集群。
az acs create --orchestrator-type=kubernetes --resource-group myResourceGroup --name=myK8sCluster --generate-ssh-keys
几分钟后,命令将完成并返回有关该集群的 json 格式的信息。
连接到 Kubernetes 集群
要管理 Kubernetes 群集,可以使用 Kubernetes 命令行工具 kubectl。
如果您使用 Azure CloudShell ,则已经安装了 kubectl 。如果要在本地安装,可以使用 az acs kubernetes install-cli 命令。
要配置 kubectl 连接到您的 Kubernetes 群集,请运行 az acs kubernetes get-credentials 命令下载凭据并配置 Kubernetes CLI 以使用它们。
az acs kubernetes get-credentials --resource-group=myResourceGroup --name=myK8sCluster
要验证与集群的连接,请使用 kubectl get 命令查看集群节点的列表。
kubectl get nodes
输出:
NAME                    STATUS                     AGE       VERSION
k8s-agent-14ad53a1-0    Ready                      10m       v1.6.6
k8s-agent-14ad53a1-1    Ready                      10m       v1.6.6
k8s-agent-14ad53a1-2    Ready                      10m       v1.6.6
k8s-master-14ad53a1-0   Ready,SchedulingDisabled   10m       v1.6.6
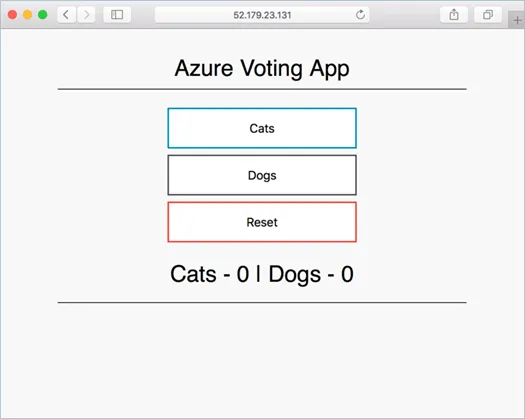
运行应用程序
Kubernetes 清单文件为集群定义了一个所需的状态,包括了集群中应该运行什么样的容器镜像。 对于此示例,清单用于创建运行 Azure Vote 应用程序所需的所有对象。
创建一个名为 azure-vote.yaml ,将下面的内容拷贝到 YAML 中。
apiVersion: apps/v1beta1
kind: Deployment
metadata:
  name: azure-vote-back
spec:
  replicas: 1
  template:
    metadata:
      labels:
        app: azure-vote-back
    spec:
      containers:
      - name: azure-vote-back
        image: redis
        ports:
        - containerPort: 6379
          name: redis

apiVersion: apps/v1beta1
kind: Deployment
metadata:
  name: azure-vote-front
spec:
  replicas: 1
  template:
    metadata:
      labels:
        app: azure-vote-front
    spec:
      containers:
      - name: azure-vote-front
        image: microsoft/azure-vote-front:redis-v1
        ports:
        - containerPort: 80
        env:
        - name: REDIS
          value: "azure-vote-back"

via: <https://docs.microsoft.com/en-us/azure/container-service/kubernetes/container-service-kubernetes-walkthrough>

作者:[neilpeterson](https://github.com/neilpeterson),[mmacy](https://github.com/mmacy) 译者:[rieonke](https://github.com/rieonke) 校对:[wxy](https://github.com/wxy)

本文由 [LCTT](https://github.com/LCTT/TranslateProject) 原创编译,[Linux中国](https://linux.cn/) 荣誉推出
发表回复